Table Of Contents
Requirements
- A Supported Icom Radio (eg. ID-51 Plus 2, ID-4100)
- Port 40000 (UDP) configured in the port forwarding section of your router
- Icom RS-MS3A (Android) or RS-MS3W (Windows) installed
- The correct data cable for your radio (if you are using an external device to connect to the reflector)
This guide assumes you already have already met the requirements above. I will be demoing how to connect to XLX842 as an example.
Information about connecting using a radio such as the IC-705 or IC-9700 will be added at a later time.
Registration
To be able to use the terminal mode software, you will need to have your callsign registered on an Icom G3 Gateway server. If the callsign you wish to use is registered on a G2 gateway, you will need to contact the gateway administrator to have your callsign removed. After your callsign has been removed across the US Trust system, you can register it on a G3 Gateway.

Icom G2 Personal Info Page 
Icom G3 Personal Info Page


You can check if you are registered and have a terminal registered as an access point here.

If you have already registered an access point terminal you can skip this next step.
If you have not registered an access point terminal you will first need to be logged into the G3 gateway you are registered on. Once logged in, click on the personal information tab. You will see a section to configure your terminals.

To setup a terminal as an access point select the first available checkbox to the left of your callsign. Then pick a capitalized letter to be appended after your callsign to use with your terminal. The letters “G” and “S” are reserved and cannot be used.
After selecting an initial, be sure to check the box under the “AccessPoint” column. After this press the “Update” button to finish adding an access point terminal.
Connecting using an Android device
To use an android device with an Icom radio in Terminal or Access Point mode you will need to have the RS-MS3A software installed from the Google Play store.

If this is your first time using the RS-MS3A software you will need to add your Callsign you setup as an access point in the Terminal/AP Callsign Field, making sure that the “initial” you selected on the G3 gateway is placed in the 8th character spot (eg. “VA6MO Z”).
Next you will select the type of gateway you are registered on. If you are registered on a Japanese gateway select “Japan”, otherwise select “Global” .
After that you will have to select whether you need UDP hole punch enabled. If you have forwarded UDP port 40000 to the IP of the android device you are using, you will probably not need this setting turned on. Otherwise, if you are having trouble connecting and receiving audio, you can try turning this on.
After these steps are completed, you will need to enter the IP Address or domain of the XLX reflector you are connecting to. For example to connect to XLX861 you would enter “xlx861.va6mo.ca” or for XLX842 you would enter “xlx842.va6mo.ca”.
When you are ready to connect to a reflector you will need to make sure your Icom radio is connected to your Android device by the data cable that is either provided with your radio, or sold separately depending on your radio model.
Connecting using a windows device
If you do not have the Icom RS-MS3W software installed, you can download it from here.
If this is your first time using this software, you will need to configure the COM port to which your radio is connected. To do this Select “COM Port” in the “Settings” menu.

Once the window below appears, select the COM port your radio is connected to from the dropdown list

After you have selected the COM Port, you can finish configuring the rest of the settings you need to connect to a reflector.

Next if you have not already done so, you will need to enter your callsign in the “Terminal/AP Callsign” field, making sure that the “initial” you selected on the G3 gateway is placed in the 8th character spot (eg. “VA6MO Z”).
Next you will select the type of gateway you are registered on. If you are registered on a Japanese gateway select “Japan”, otherwise select “Global”.
After that you will have to select whether you need UDP hole punch enabled. If you have forwarded UDP port 40000 to the IP of the android device you are using, you will probably not need this setting turned on. Otherwise, if you are having trouble connecting and receiving audio, you can try turning this on.
After these steps are completed, you will need to enter the IP Address or domain of the XLX reflector you are connecting to. For example to connect to XLX861 you would enter “xlx861.va6mo.ca” or for XLX842 you would enter “xlx842.va6mo.ca”.
Once you have completed these steps, make sure your radio is connected and then press “Start”.
Configuring your radio
Terminal Mode
This section will use an Icom ID-51 Plus 2 as the example radio, be sure to follow the correct steps listed in your Owner’s Manual.
If you are using Terminal mode you will need to set the Your Call (UR) to be able to connect to the correct module on the reflector (see your radio instructions for how to set the Your Call).

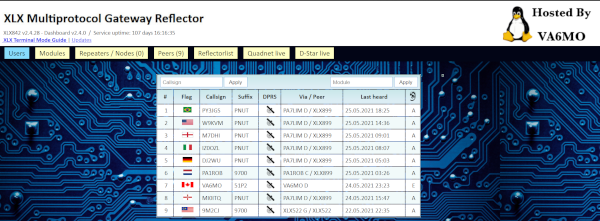
The correct settings for the Your Call field are /XLX###M where ### is the number of the XLX reflector you are connected to, and M is the letter of the module you wish to connect to. In the above example it is set to use XLX842 Module E.
Once you have the correct settings in the Your Call field, press PTT on your radio, and you should then be connected to the module you wish to use.
Access Point Mode
This information will be added in the next update of this page
This guide is not a final version, and maybe subject to revisions.